 Restricting which managed identities can access an Azure application
When you attach a service account to a VM instance on Google Cloud, an application running on the VM can obtain an access token for the attached service account by querying the metadata server. It can then use this access token to access Google Cloud resources (assuming the service account has been granted access).
Applications can also obtain an ID token for the attached service account. Google Cloud doesn’t really specify what to use this ID Token for, but one common use case is to use it for authenticating service-to-service communication.
On Azure, managed identities serve a similar purpose as attached service accounts on Google Cloud. By attaching a managed identity to a compute resource such as a VM, you enable an application that runs on the VM to obtain access tokens. It can then use these tokens to access Azure resources.
An interesting difference between managed identities and attached service accounts is that managed identities don’t support ID Tokens. To use managed identities for service-to-service communication, you have to use an access token, and a common way to do this is to:
- Register a new application in Azure AD that represents the target resource or service
- Let the calling service use managed identities to obtain an access token for the Azure AD application
- Use the access token to authenticate communication
Using access tokens for authenticating service-to-service communication is actually more in line with how OAuth 2 is supposed to be used than using ID Tokens for this purpose. So I actually like Azure’s approach here. But having to manage an application in Azure AD also creates a new challenge – how do we control access to the application? How can we ensure that only certain managed identities can obtain access tokens for the application?
Let’s find out.
Creating a new application
To get started, we need to register a new application in Azure AD. We’re not planning to use 3-legged OAuth with this application, so it’s not necessary to specify a redirect URI.
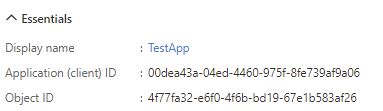
As every object in Azure AD, applications have an Object ID. But more commonly, applications are referred to by their Application ID (AppID). This identifier also serves as the OAuth Client ID:
There is another identifier for applications, which is the Application ID URI. If set, Azure AD uses this URI as audience (aud)
in access tokens. An Application ID URI is also necessary if we want to use managed identities to obtain access tokens for the application.
So let’s add an Application ID URI to our app:
- Open the Expose an API blade of the app registration,
- Next to Application ID URI, click Set
- It doesn’t really matter which URL we use here, so let’s keep the default which in my case is
api://00dea43a-04ed-4460-975f-8fe739af9a06.
To make things a bit more interesting, let’s further customize the app to include a few custom claims in the access tokens:
- Open the Token configuration blade
- Select Add optional claim.
- Select Access and check idtyp and tenant_region_scope.
- Click Add.
As to be expected, our new application shows up in the output of Get-AzureADApplication:
ObjectId                             AppId                                DisplayName
--------                             -----                                -----------
4f77fa32-e6f0-4f6b-bd19-67e1b583af26 00dea43a-04ed-4460-975f-8fe739af9a06 TestApp \
Somewhat more interestingly, the portal also created a service principal for us, as indicated in the output of Get-AzureADServicePrincipal:
ObjectId                             AppId                                DisplayName
--------                             -----                                -----------
4e00e496-2b77-4189-95e1-b5c84436692e 00dea43a-04ed-4460-975f-8fe739af9a06 TestApp
Notice how the 2 objects are linked by a common AppID.
If we view the details of the service principal, we notice that AppRoleAssignmentRequired is false – we’ll get to that later:
> Get-AzureADServicePrincipal -ObjectId 4e00e496-2b77-4189-95e1-b5c84436692e | fl

DeletionTimestamp                  :
ObjectId                           : 4e00e496-2b77-4189-95e1-b5c84436692e
ObjectType                         : ServicePrincipal
AccountEnabled                     : true
AddIns                             : {}
AlternativeNames                   : {}
AppDisplayName                     : TestApp
AppId                              : 00dea43a-04ed-4460-975f-8fe739af9a06
AppOwnerTenantId                   : 7e8c596...
AppRoleAssignmentRequired          : False
AppRoles                           : {}
...
ServicePrincipalNames              : {api://00dea43a-04ed-4460-975f-8fe739af9a06, 00dea43a-04ed-4460-975f-8fe739af9a06}
ServicePrincipalType               : Application
...
Testing the application
To check if the application works, and whether the token includes the claims that we expect, let’s do a quick test without managed identities first:
- Open the Certificates & secrets blade
- Select New client secret.
- Enter a description and select an expiry date.
- Select Add.
Let’s fire up a PowerShell prompt and request an access token:
Connect to Azure AD:
Connect-AzureAD -TenantId "[tenant-id]"Populate a few variables:
Add-Type -AssemblyName System.Web
$TenantId = "[tenant-id]"
$ClientId = "[app-id]"
$ClientSecret = [System.Web.HTTPUtility]::UrlEncode("[client-secret-value]")
$AppUri = "[app-uri]"
In my case, this looks like:
Add-Type -AssemblyName System.Web
$TenantId = "7e8c5..."
$ClientId = "00dea43a-04ed-4460-975f-8fe739af9a06"
$ClientSecret = [System.Web.HTTPUtility]::UrlEncode("CxoVS5...")
$AppUri = "api://00dea43a-04ed-4460-975f-8fe739af9a06"
Now we can request an access token for the application by passing the Application ID URI in the
resourceparameter:Invoke-RestMethod ` -Method Post ` -Uri "https://login.microsoftonline.com/$TenantId/oauth2/token" ` -Body "grant_type=client_credentials&client_id=$ClientId&client_secret=$ClientSecret&resource=$AppUri" ` -ContentType 'application/x-www-form-urlencoded'This returns:
token_type     : Bearer
expires_in     : 3599
ext_expires_in : 3599
expires_on     : 1628666505
not_before     : 1628662605
resource       : api://00dea43a-04ed-4460-975f-8fe739af9a06
access_token   : eyJ0eXAiOiJKV1QiLCJhbGciOiJSUzI1NiIsIng1dCI6...
If we decode the JWT, the body looks like this:
{
  "aud": "api://00dea43a-04ed-4460-975f-8fe739af9a06",
  "iss": "https://sts.windows.net/7e8c5963-8c6b-472e-b9c9-43118267cdbf/",
  "iat": 1628662605,
  "nbf": 1628662605,
  "exp": 1628666505,
  "aio": "E2ZgYDj7usDZZ+nzIO79z8+tkjfPBQA=",
  "appid": "00dea43a-04ed-4460-975f-8fe739af9a06",
  "appidacr": "1",
  "idp": "https://sts.windows.net/7e8c5963-8c6b-472e-b9c9-43118267cdbf/",
  "idtyp": "app",
  "oid": "4e00e496-2b77-4189-95e1-b5c84436692e",
  "rh": "0.AXQAY1mMfmuMLke5yUMRgmfNvzqk3gDtBGBEl1-P5zmvmgZ0AAA.",
  "sub": "4e00e496-2b77-4189-95e1-b5c84436692e",
  "tenant_region_scope": "EU",
  "tid": "7e8c59...",
  "uti": "9-flBG0-VUOlWWLv1kIQAA",
  "ver": "1.0"
}
We can see that:
audandappidboth contain the AppID of our applicationoidandsubboth contain the Object ID of the application’s service principalidtypis app, indicating that the token was issued for an applicationtenant_region_scope, our second custom claim, contains the region code- ver is
1.0, so we’re getting the old token format by default. We can change that by updating the application manifest if we want, but it doesn’t really matter here.
This worked as expected, but the endpoint we used is actually deprecated. The new endpoint doesn’t support a
resourceparameter anymore – instead, it expects us to specify a scope. Because we haven’t created any custom scopes, we can use<App ID URI>/.defaultas scope:Invoke-RestMethod ` -Method Post ` -Uri "https://login.microsoftonline.com/$TenantId/oauth2/v2.0/token" ` -Body "grant_type=client_credentials&client_id=$ClientId&client_secret=$ClientSecret&scope=$AppUri/.default" ` -ContentType 'application/x-www-form-urlencoded'
Now that we know the application works as expected, we can delete the secret and move on to managed identities.
Obtaining tokens using a managed identity
To test managed identities, let’s create a new Azure VM that uses a system-assigned managed identity.
Once the VM is up and running, we can a new service principal in the output of Get-AzureADServicePrincipal:
ObjectId                             AppId                                DisplayName
--------                             -----                                -----------
0b5aed7a-2f61-42cd-9a85-85356ca86a49 14cf0169-357d-43c1-ae2a-955f529627e0 centos-1
Each managed identity (system-managed or user-managed) also comes with a new App ID. Interestingly, these
applications don’t show up in Get-AzureADApplication however.
On the VM, we can now request a token from the Azure Instance Metadata Service (IMDS) by
using the “old” method of passing the Application ID URI in the resource parameter:
$AppUri = "api://00dea43..."

Invoke-RestMethod `
  -Method Get `
  -Uri "http://169.254.169.254/metadata/identity/oauth2/token?api-version=2018-02-01&resource=$AppUri" `
  -Headers @{Metadata="true"}
This returns:
access_token   : eyJ0eXAiOiJKV1QiLCJhbGciOiJSUzI1NiIsIn...`
client_id      : 14cf0169-357d-43c1-ae2a-955f529627e0
expires_in     : 86400
expires_on     : 1628751010
ext_expires_in : 86399
not_before     : 1628664310
resource       : api://00dea43a-04ed-4460-975f-8fe739af9a06
token_type     : Bearer
If we decode the JWT, the body looks like this:
{
  "aud": "api://00dea43a-04ed-4460-975f-8fe739af9a06",
  "iss": "https://sts.windows.net/7e8c5963-8c6b-472e-b9c9-43118267cdbf/",
  "iat": 1628664310,
  "nbf": 1628664310,
  "exp": 1628751010,
  "aio": "E2ZgYCgSCI3KW7+rSY6x08hToC4DAA==",
  "appid": "14cf0169-357d-43c1-ae2a-955f529627e0",
  "appidacr": "2",
  "idp": "https://sts.windows.net/7e8c5963-8c6b-472e-b9c9-43118267cdbf/",
  "idtyp": "app",
  "oid": "0b5aed7a-2f61-42cd-9a85-85356ca86a49",
  "rh": "0.AXQAY1mMfmuMLke5yUMRgmfNv2kBzxR9NcFDriqVX1KWJ-B0AAA.",
  "sub": "0b5aed7a-2f61-42cd-9a85-85356ca86a49",
  "tenant_region_scope": "EU",
  "tid": "7e8c5963-8c6b-472e-b9c9-43118267cdbf",
  "uti": "Ekp7LDGCXUq8FOHf9b1-AA",
  "ver": "1.0"
}
This token looks very similar to the one we saw before, but this time the oid and sub both contain the Object ID of the managed
identity’s service principal (as shown in Get-AzureADServicePrincipal above).
Restricting access
Notice that we didn’t have to do anything to allow our managed identity to obtain access tokens for the application – it just worked.
That’s because AppRoleAssignmentRequired is set to false by default, meaning anybody (in the tenant) can access the application.
To restrict access to the application, we first have to toggle the AppRoleAssignmentRequired flag. We can do that in the portal by
opening the enterprise application’s Properties blade and setting User assignment required to Yes:
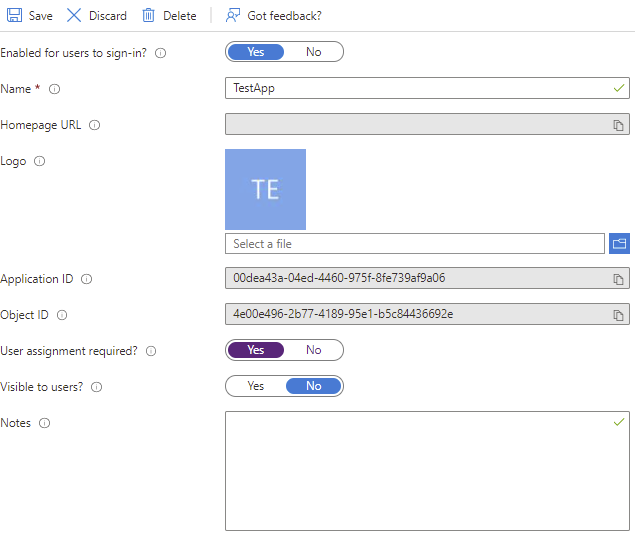
Notice that it can take a long time (i.e., hours) before this change takes effect on our running VM – but if we wait long enough, we can notice that requesting tokens now fails:
> Invoke-RestMethod `
    -Method Get `
    -Uri "http://169.254.169.254/metadata/identity/oauth2/token?api-version=2018-02-01&resource=$AppUri" `
    -Headers @{Metadata="true"}

Invoke-RestMethod: {"error":"invalid_grant","error_description":"AADSTS501051: Application '14cf0169-357d-43c1-ae2a-955f529627e0'(centos-1) is not assigned to a role for the application 'api://00dea43a-04ed-4460-975f-8fe739af9a06'..."}
Instead of allowing access by default, we’re denying access by default now. But how can we re-grant access to our managed identity? For that, we need to create an app role:
- Open the App roles blade of the app registration.
- Select Create app role and use the following settings
- Display name: AppUsers
- Allowed member types: Applications
- Value:
App.Use - Description: Allow usage of app
- Select Apply
To list the app roles defined by an application in PowerShell, we can use Get-AzureADApplication again:
> $AppObjectId = "4a56049f-f2f8-4910-9da1-748ae126ebbd"

> (Get-AzureADApplication -ObjectId $AppObjectId).AppRoles

AllowedMemberTypes : {Application}
Description        : Allow usage of app
DisplayName        : AppUsers
Id                 : 4f77fa32-e6f0-4f6b-bd19-67e1b583af26
IsEnabled          : True
Value              : App.Use
Now we grant the App.Use role to the managed identity:
# Object ID of the managed identity as returned by Get-AzureADServicePrincipal
$ManagedIdentityObjectId = "0b5aed7a-2f61-42cd-9a85-85356ca86a49"

# Object ID of the service principal/enterprise application
$AppServicePrincipalObjectId = "4e00e496-2b77-4189-95e1-b5c84436692e"

New-AzureADServiceAppRoleAssignment `
    -ObjectId $ManagedIdentityObjectId `
    -Id (Get-AzureADApplication -ObjectId $AppObjectId).AppRoles.Id `
    -PrincipalId $ManagedIdentityObjectId `
    -ResourceId $AppServicePrincipalObjectId
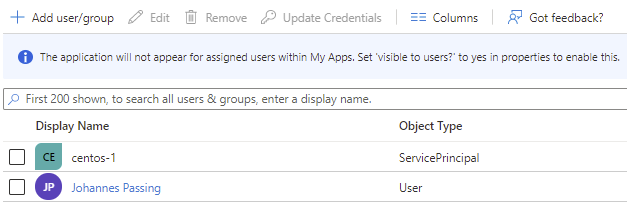
If we look at the Users and groups blade of the enterprise application, we can now see that centos-1
(that’s the VM’s managed identity) shows up as having access to the application:
Now let’s return to the VM and run the previous PowerShell command again:
Invoke-RestMethod `
    -Method Get `
    -Uri "http://169.254.169.254/metadata/identity/oauth2/token?api-version=2018-02-01&resource=$AppUri" `
    -Headers @{Metadata="true"}
Thanks to the app role assignment, we’re getting a token again:
access_token   : eyJ0eXAiOiJKV1QiLCJhbGciOiJSUzI1N...
client_id      : 14cf0169-357d-43c1-ae2a-955f529627e0
expires_in     : 86400
expires_on     : 1628753156
ext_expires_in : 86399
not_before     : 1628666456
resource       : api://e49a5f8a-bf71-410c-a26a-0f4772141b8a
token_type     : Bearer
By granting or revoking the App.Use role to individual service principals or managed identities, we can now control which managed identities can obtain tokens for the application.